You want to be a mushroom farmer, and I totally understand why.
Learning how to grow mushrooms for any reason can be extremely rewarding and engaging. They’re just so interesting!
The more you practice growing mushrooms, the more there is to learn. Your journey will be long, because there’s an endless variety of new techniques and experiments to play with along the way.
But as your skills advance, and you start to grow more mushrooms than you can handle, you may start to wonder how you can turn your small scale hobby into a fully operational mushroom farming business.
And you might have a ton of questions.
- What does a mushroom farm even look like?
- How much is it going to cost me?
- What kind of set up will I need?
- How many pounds of mushrooms can I really grow?
- Can I sell them?

Parts of a Mushroom Farm
Growing mushrooms from spore to fruit is a rather complex process which requires a lot of things to be done just right in order to achieve consistent and predictable results. A fully operational mushroom farm has a lot of moving parts which need to be working together and firing on all cylinders. So, to help simplify things a bit, let’s break the mushroom farm down into its three basic parts:- The Laboratory,
- The Preparation Area, and
- The Grow Room.

The Lab
This is where it all begins, and is usually the hardest part of the growing cycle for new cultivators to understand and master. Mushroom mycelium needs a moist and nutrient rich growing medium in order to develop without inhibition, such as a jar full of grain or a agar filled petri-dish. Unfortunately, these environments are also ideal growing conditions for competing bacteria and mold. If these undesirables take hold, they will usually outpace the growth of, and eventually defeat, the intended mushroom mycelium. The cultivator therefore needs to provide a “safe space”, such as a laboratory, in order handle and propagate mushroom cultures.
The lab should be an area sealed off from the rest of the operation. It should have smooth floors and smooth walls, easily cleaned with a light bleach solution. The lab table and shelf should also be smooth and washable. Basically, anything that enters the laboratory should be under scrutiny, including the cultivator herself.
The cultivator needs to be prepared to only enter the lab with clean clothes, shoes, hands and hair. Good hygiene is imperative. Generally, it is easier to prevent contaminants from getting in the lab than it is to remove them once they have taken hold.
The cornerstone of a functional laboratory is a well made laminar flow hood. This is essentially a box with a blower fan forcing air through a HEPA filter, providing a clean stream of air in which inoculations, transfers, and other mycological work can safely take place.
Using a laminar flow hood, along with proper sterile techniques is the best defense against molds and bacteria.

If you do not want to dedicate to converting an entire room into a laboratory, it is also possible to just set up a temporary clean space when you want to do lab work. You could just set up your laminar flow hood in a bedroom or bathroom on a clean table and try and be extra considerate about only exposing agar plates, grain jars and other sensitive materials directly in the stream of the flow.
Worst case scenario, you can try to do all your lab work within the confines of a SAB or “still air box”.
This is an OK option for small scale agar work, but is really difficult when trying to do inoculations of supplemented sawdust blocks of large bags of grain spawn. The SAB is a reasonable option for very small scale growers, but one can expect higher levels of contamination in the long run.

Ditch the Lab?
Of course, it is possible to have a mushroom farm without any lab at all, providing you have no interest in making your own grain spawn. Purchasing pre-made grain spawn is a reasonable choice for the mushroom farmer who just wants to get up and running quickly, without the hassle of dealing with agar cultures, pressure sterilizing grain, and doing clean work in front of a hood. This way, you can simply use the pre-made grain spawn to grow mushrooms on pasteurized straw– skipping the sterilization process all together.
There are advantages to having your own culture library, however. Aside from gaining valuable skills, having a better understanding of the mushroom life cycle and developing your own cultures, making your own spawn might also be cheaper over the long run when compared to buying commercial spawn. This will lower your overall operating costs, and help the profitability of your farm.
You have to decide for yourself whether or not it makes sense to manage your own cultures. If you have started as a hobby grower, you likely already have the skills required to grow from agar cultures, in which case it might make good sense to build a lab. If, however, you are starting a farm with no experience at all, it might make more sense to start with commercial spawn.

The Prep Area
This is where the grunt work happens. The prep should be relatively clean, but nowhere near is laboratory- level clean necessary. A garage or outdoor shed is a perfectly acceptable location. A few different things happen in the prep area, depending on what method of cultivation you are using on your farm. If you are making your own grain spawn, the prep area is where you will ready the grains for sterilization. This means rinsing and soaking the grains, simmering them so that they absorb some moisture, and finally, cooling and draining the grains before they go into jars or bags. If you are growing a lot of mushrooms, and making a lot of grain spawn, it is good to have a larger dedicated space for these tasks, rather than using your kitchen or bathtub.
If you are growing mushrooms on supplemented sawdust, you won’t be inoculating the bags in this area- that will instead take place in front of a flow hood. But you can use this area for soaking, mixing, and stuffing the grow bags with substrate. You can also use it for storing your wood pellets, bran, and other supplies. It’s handy to have a scale in the prep area so you can quickly weigh how much supplemented sawdust goes into each bag.
The prep area can also be where you pressure-sterilize your grain or supplemented sawdust.
This can be done on the kitchen stove, but a good pressure sterilizer is usually heavy, big, and loud, so it can be advantageous to have a dedicated space. Keep in mind your safety when using pressure sterilizers. Hot, pressurized steam can be dangerous.

A prep area really shines when you’re growing mushrooms on straw. Straw is messy, and isn’t fun to deal with inside the house. Here, you can set up a 55 gallon drum and propane burner for pasteurizing your straw. Keep in mind that this will need to be done outside, or in a well ventilated area.
Alternatively, you can use an electric-drum pasteurizer, which can be done in a enclosed space, but in my opinion is not as effective.
Inside the prep area, you need to have a large table in order to spead out and cool the straw after pasteurization.
You want the straw to cool quickly so that it is a reasonable temperature for inoculation with grain spawn. Generally, you want to add your spawn to the straw as soon as it is cool enough to do so, and a prep area is a great place to achieve that.
A good prep area will make the farm run smooth and efficiently. As stated before, it is possible to achieve most of the above tasks in a household kitchen, but it does really pay off to have a dedicated space.

The Grow Room
If the lab is where it all begins, and the prep area is where the grunt work takes place… then the grow room is where the magic happens! The hard work finally pays off and the dedicated cultivator is rewarded with top-notch mushrooms. Your grow room can vary in size and shape, and should be tailored to fit with the amount of mushrooms you want to produce. Once you practice growing, and know what yields you can achieve, you will have a good idea of what size grow room you want. The style of grow room you choose also depends highly on the type of mushrooms you choose to grow and the way you choose to grow them.
If you are growing on straw logs, you are going to want to have a rigid bar to hang the logs. You can have one long 5-6 ft log, but for smaller operations it is usually better to have two rows, one on top of the other, with smaller grow logs. They are much easier to handle.
If you choose instead to grow your mushrooms using grow bags with supplemented sawdust, you’ll want to use shelves. The light requirements for most mushrooms isn’t near what is required for plants, so there is no reason why you can’t have shelves of mushrooms, with only the top shelf receiving direct light.
Make sure the shelves you choose are not made of material that can harbor molds and decompose, such as wood. Your grow room will be consistently moist, and wooden shelves will eventually lead to contamination problems.
Controlling the Grow Room Environment
At its core, a grow room is just a functional space in a controlled environment. You will want to be able to manage the CO2 levels, the humidity, and the temperature of the space. Managing the CO2 levels just means that you need a way to add fresh air to the space on a regular basis. Different mushrooms require different levels of fresh air, but in general, all mushrooms need a threshold level of fresh air exchanges in order to grow properly. Low amounts of fresh air will cause the mushrooms to produce long chewy stems and small caps. Fresh air exchange is usually achieved with a blower fan that brings fresh air in from outside the grow room on a regular basis. Humidity is possibly the most critical factor that you need to control in the grow room. Because so much fresh air is required, humidity also needs to be constantly added to the grow room for best results. If the humidity is too low, the mushroom fruit bodies can become cracked, or even worse, may fail to form at all. If the humidity is too high, on the other hand, you could run into issues like bacterial blotch and other forms of contamination.
Although there are differences among different species and stages in the growing cycle, a good target to aim for in the grow room is between 85-95% relative humidity. You will need an accurate hygrometer for best results. There are lots of different ways to add humidity to a grow room. One popular method is to simply place an ultrasonic floating disc pond fogger in a bucket full of water and set it on a timer to suit your needs. The water should be changed often.
Temperature is also a critical factor that needs to be controlled to successfully grow great mushrooms. Generally speaking, mushrooms prefer cool, humid environments. Some mushrooms, like the pink or yellow oyster, like it to be a little warmer, but this is the exception rather than the rule. Most mushrooms will grow more robust and meaty fruits if the temperature is kept to about 15-18 deg C during fruiting.
Some mushrooms even need a “cold shock” in order to induce fruiting. This makes sense, as it is a way of tricking the mushrooms into thinking that fall is setting in and it’s time to spread their spores. Keep in mind that air conditioners and heaters both affect the amount of humidity in the air, so the relative humidity needs to be watched closely during large temperature swings.

The cleanliness requirements for a grow room are formidable, but not nearly as stringent as the laboratory. Generally, a grow room should have smooth washable walls and floors, and be should be easy to wash on a regular basis with a dilute bleach solution.
Again, it is easier to keep contaminants away than to get them out. If any mold or contamination is spotted on any part of the mushroom, it must be removed from the grow room and properly disposed of so that the contamination does not spread.
The grow room is a crucial aspect of the mushroom farm, and it will never be quite perfect, especially at first. Properly managing a grow room takes practice and a strong familiarity with your particular species of mushrooms and the climate in which you are trying to grow in.
It is more of an art than a science.
A cultivator needs to be ever-observant of the mushroom and how it is reacting to the environment around it, and able to adjust accordingly.
Types of Mushrooms to Grow
There are many wonderful different types of mushrooms to choose from, but don’t make this decision lightly- there are too many things to consider. First, you have to consider of you want to grow just one type of mushroom, or if you want to grow multiple species. There are advantages and disadvantages to both. Growing just one type of mushroom means that you have fewer complications to deal with when creating grain spawn and trying to time the mushroom cycle. It also allows you to dial in the environmental conditions in your grow room (if you only have one) without compromising. That being said, if you are trying to sell mushrooms, it might be beneficial to have some variety. You also have to consider that different mushrooms will have different shelf lives, handling ability and utility in the kitchen. They will also have different market acceptability and demand a unique price per pound, depending on where you intend to sell your mushrooms. Basically, it depends. And it’s up to you. But I would like to offer some suggestions.Blue Oyster Mushrooms

Blue oyster mushrooms are easy to grow, especially when growing on straw logs where they can rapidly produce big yields. Oyster mushrooms are also relatively well known and available, although you will rarely find fresh, good looking oyster mushrooms at most grocery stores.
This means that you might be able to demand a good price for your mushrooms.
Pleurotus species mushrooms do not take well to shipping long distances, so you might have an edge over bigger commercial growers. Check out your local scene and see if the price they demand will be worth your effort.
King Oyster Mushrooms

King Oyster mushrooms are also quite easy to grow, although they tend to grow better on supplemented sawdust than they do on straw. The best part about the king oyster mushroom is their long shelf life. Typically, a properly harvested king oyster mushroom will be sellable for up to two weeks, which is not common for most other gourmet species. Unfortunately, this also means that king oyster mushrooms are easily shipped long distances. Chances are that you will be competing with cheap commercially grown king oyster mushrooms from Chinese or Korean suppliers. However, these kings are generally grown with small caps and big fat stems. You could differentiate yourself by growing kings in a bright, low CO2 environment to produce a unique looking king with big caps and small stems.
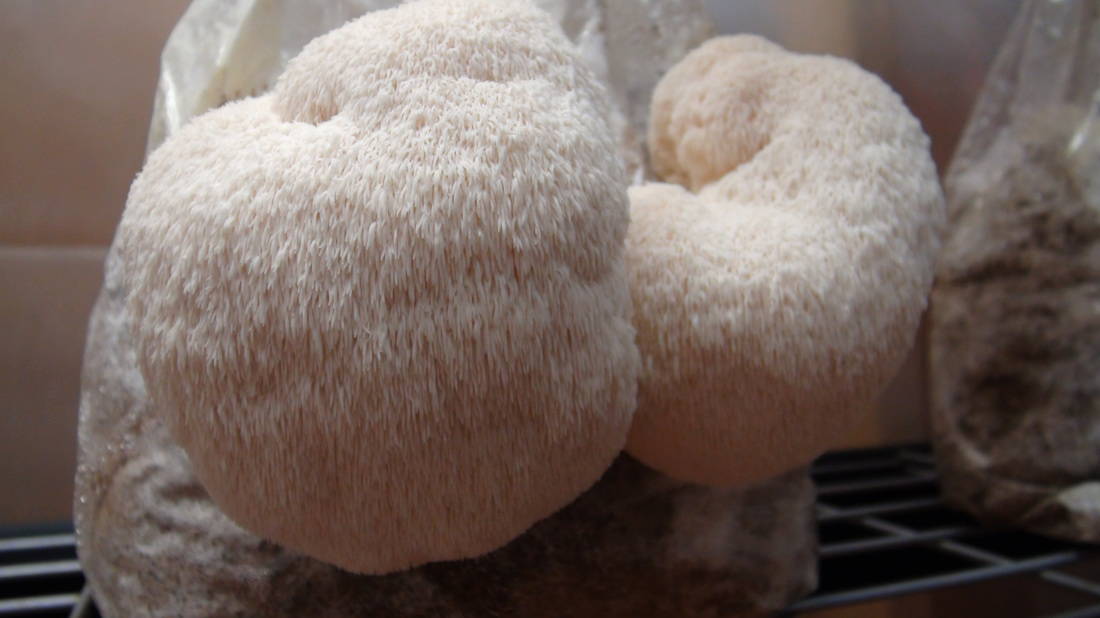
Lion's Mane Mushrooms

Consistently growing fresh Lions Mane Mushrooms might really set you apart from the crowd, as these mushrooms are not often sold to consumers from commercial growers. This is likely because there delicate teeth require careful handling and packaging. However, a small local grower might be able carefully harvest this mushroom and deliver it straight to the customer. Although these mushrooms are unknown to a lot of chefs and consumers, they are generally well liked when experienced and could provide a unique market opportunity.
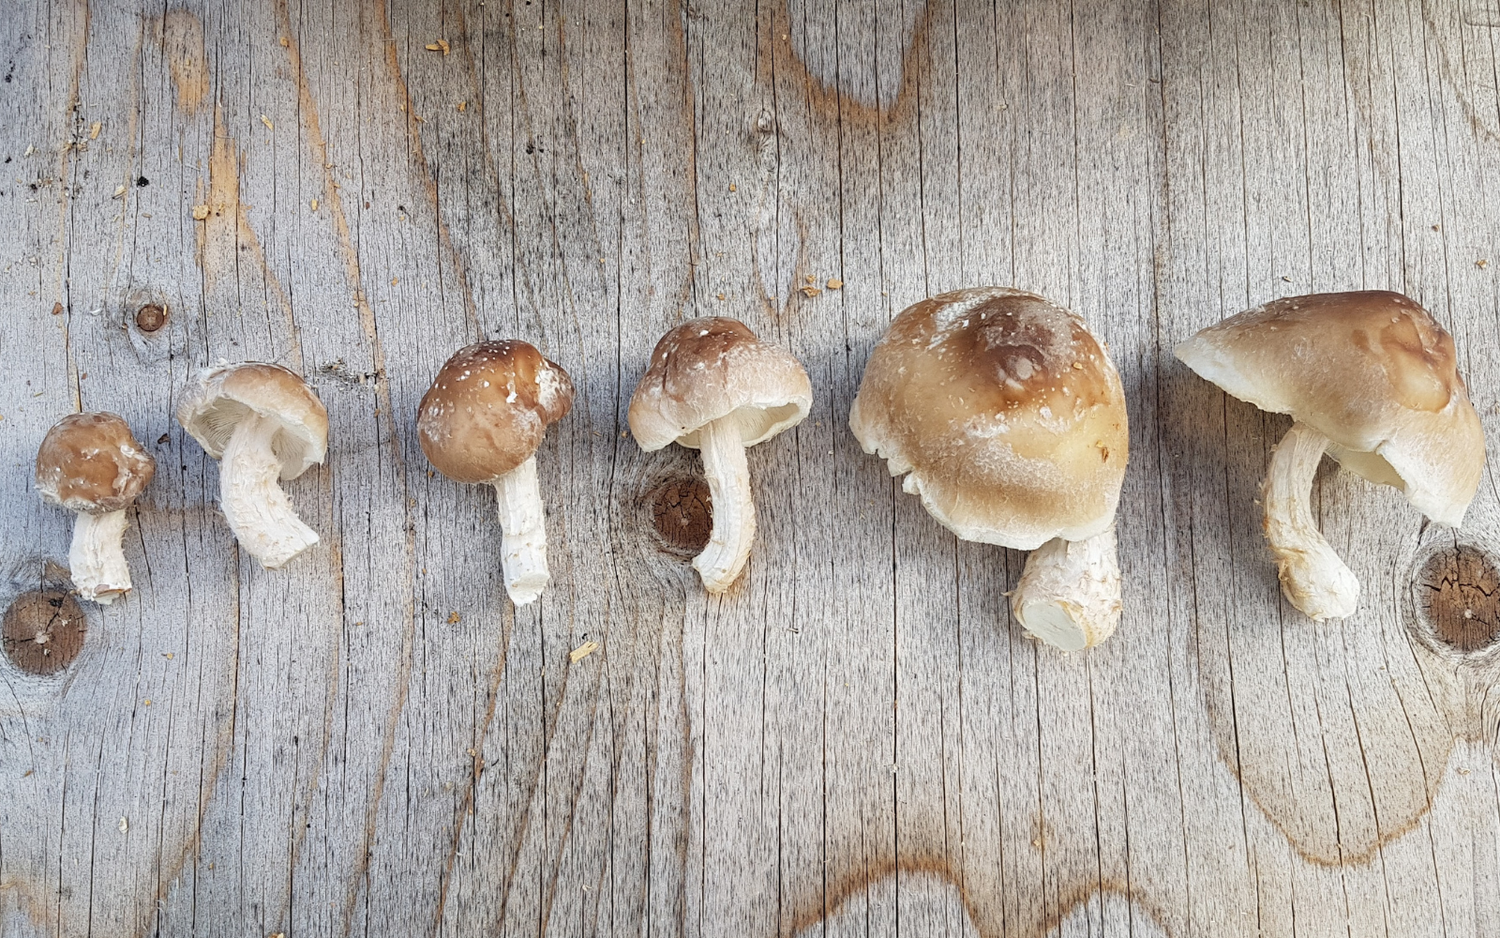
Shiitake Mushrooms

Shiitake mushrooms are a little more difficult to grow, and are maybe not the best choice for the beginner mushroom farmer. However, if you can properly grow these mushrooms, there is likely to be a reasonable demand. Shiitake mushrooms are well known and well liked, so you should have no trouble trying to promote your product. Again, you are likely to have to compete with large commercial sellers, so be sure to check out what your market is like before going all in with shiitake.
Harvesting and Storage
No matter what mushroom you decide to grow, you are going to need to properly harvest and store before delivering it to your kitchen or your customers. Harvesting your mushrooms is rewarding, but it is also a pretty time consuming process which takes a while to start doing efficiently. You will want to treat harvesting your mushrooms like any other aspect of food preparation. This means only using clean tools and equipment, wearing clean clothes and gloves, and having a wash sink nearby. Ensure that your knife is cleaned often, as it doesn’t take long for harmful bacteria to grow on your knife, which could get passed on to your final product. You also might want to consider wearing a really good mask, especially when harvesting Pleurotus species oyster mushrooms. It is common for mushroom growers to develop an allergy to the spores of these mushrooms, which can get worse over time. Some growers choose not to grow pleurotus for this reason. Wearing a good mask when in the grow room is your best defense against developing this allergy.
Generally, harvesting involves cutting the mushroom fruit body off at the stem and removing any remaining substrate material. This is where you can really shine above your competition, by making sure that you are only sending your customers cleanly harvested, high quality mushrooms. Generally, you will want to have a scale nearby when harvesting so that you can weigh your mushrooms to get an idea of your yield and how much you are actually producing.
Often, substrate blocks and straw logs can be harvested multiple times, with diminishing returns and higher chances of contamination after the 2nd or 3rd harvest. When the substrate is finally spent, you will need to properly dispose of it in a compost pile or similar.
This is a huge consideration that is often overlooked by new growers, as the amount of spent substrate can become a large pile (and large problem!) rather quickly. You might need to work something out with a local land owner in order to properly dispose of your substrate.

Cost Considerations
If you are taking mushroom farming from hobby to business, you need to consider what it is going to cost and whether or not it’s going to be worth it. Doing a 100 page business plan doesn’t really make a lot of sense either, as there are just too many variable to get an accurate picture of success, but you should at least have a basic idea of what is involved. The cost of a mushroom farm is highly variable and will no doubt depend on your individual situation. Do you already own a building? Are you going to be operating out of your house? Are you planning on building a lab or just buying grain spawn?
Although it is not wise for me to be specific about costs, I will suggest that you need to add at least %50 percent to what you first think it will cost. There are so many little things that you won’t even think about that will end up being a substantial cost.
The big expense items will be building materials for setting up your grow room, lab, prep area and any other areas that you want to set up. As for equipment, your big costs will be sterilization equipment, a method of pasteurization and a pre-built or homemade laminar flow hood.
You may also need a blower fan, humidifier and other HVAC equipment, depending on your set up. And don’t forget about consumables, like gloves and alcohol, grow bags or poly tubing, substrates and grain and, of course, your mushroom cultures.
As you can imagine, setting up a mushroom farm can be quite costly, but for many people, the idea of building their very own farm and running the show makes every penny worth it.

Local Regulations and Setting up a Business
This is my least favorite part of starting up a mushroom farm, the legal stuff. Depending on where you want to grow, you will almost certainly have to deal with your local county or city regulations, especially if you are setting up to grow out of your own home. You will need to consider zoning laws, and may need to obtain a special license. Your local gatekeepers are likely to have a lot of questions about your farm, so be sure you are armed with all the right answers to quell their fears. The big concerns with a home mushroom farm from the point of view of a regulator will be increased traffic on your property, potential noise and smells, disposal of waste, and potential damage to the building from high humidity. You will have a good shot at gaining permission for your farm if you have a well thought out plan that can address these concerns. You also have to consider potential liability concerns. Basically, since you are selling food, there is always the possibility that someone could get sick from your mushrooms. Even if you are sure your mushrooms are always top-notch, it could be difficult to prove if someone ever tried to sue you. This is unfortunate, and ugly, but it’s the world we live in, so it’s best to protect yourself.
One way to do this is to get liability insurance for your mushroom farming business. A specialty broker should be able to work something out with you that will be quite reasonable. Phone around and get opinions from as many brokers as you can if you are going to go this route.
The other thing you should consider is to set up a Limited Liability Corporation (LLC). This will be an entity in with which you operate your business, and can protect your personal assets should you ever be sued by an unhappy customer or chased down by creditors. It is also helpful to have an LLC if you want to sell to grocery stores, or when you are ready to really grow your little business.
We may be getting well ahead of ourselves here, but these are all things that need to be considered if you are thinking about setting up a real farm.
Selling Mushrooms
Once your farm is firing on all cylinders, you’ve protected yourself from liability and you’ve grown some primo mushrooms- it’s time to get out there and sell ‘em! There are plenty of different options to reach your potential customers. A common way to start is to set up a small booth at the farmers market. This will allow you to cheaply gauge market reaction, see what your customers like, and see where you should set your prices. The only downside to selling at the farmers market is timing. Unless you have your farm entirely dialed in, it will be difficult to have your mushrooms perfectly ready for harvest the day before the weekly market. Because of this, you often have to either pick your mushrooms too early or too late, neither of which are good options when you want to put your best product in the hands of your customers.
Another option is to sell directly to chefs. This is where you need to develop great relationships and network throughout the restaurant scene in your community. Most chefs will be delighted to see “rare” fresh and healthy looking mushrooms from a local farmer. This is where you can likely demand fair prices for your best mushrooms.
Depending on where you live, you might be able to sell your whole crop directly to chefs on a regular basis. This saves having to set up a booth at the market, and there is no need to market directly to consumers, which some growers find appealing.
The biggest potential, of course, is getting your product directly into grocery stores. Unfortunately, grocery stores usually have some pretty high standards for minimum order quantities, delivery schedule and prices. Also, major chain stores will likely want to audit your operation to ensure it meets their standards for food handling safety.
Allow these regulations aren’t crazy, they can usually be pretty costly to implement. Here you will be competing directly with the big boys, so you will need to find a way to stand out. Building a brand and selling yourself as a “local” grower can go a long way towards swaying the customer. Grocery stores are likely not your first step when selling mushrooms.
You will likely not be able to compete on price or volume, but you might be able to offer more variety or a fresher product.
Find your edge.
