Keeping mold spores, bacteria, and other nastiness out of your mushroom spawn is a constant fight for the cultivator.
You could use a glove box with a pretty high rate of success, but anyone who wants to get serious about growing mushrooms needs to consider using a laminar flow bench.
Having a clean stream of air to work in is way more comfortable and much easier to use than an awkward glove box.
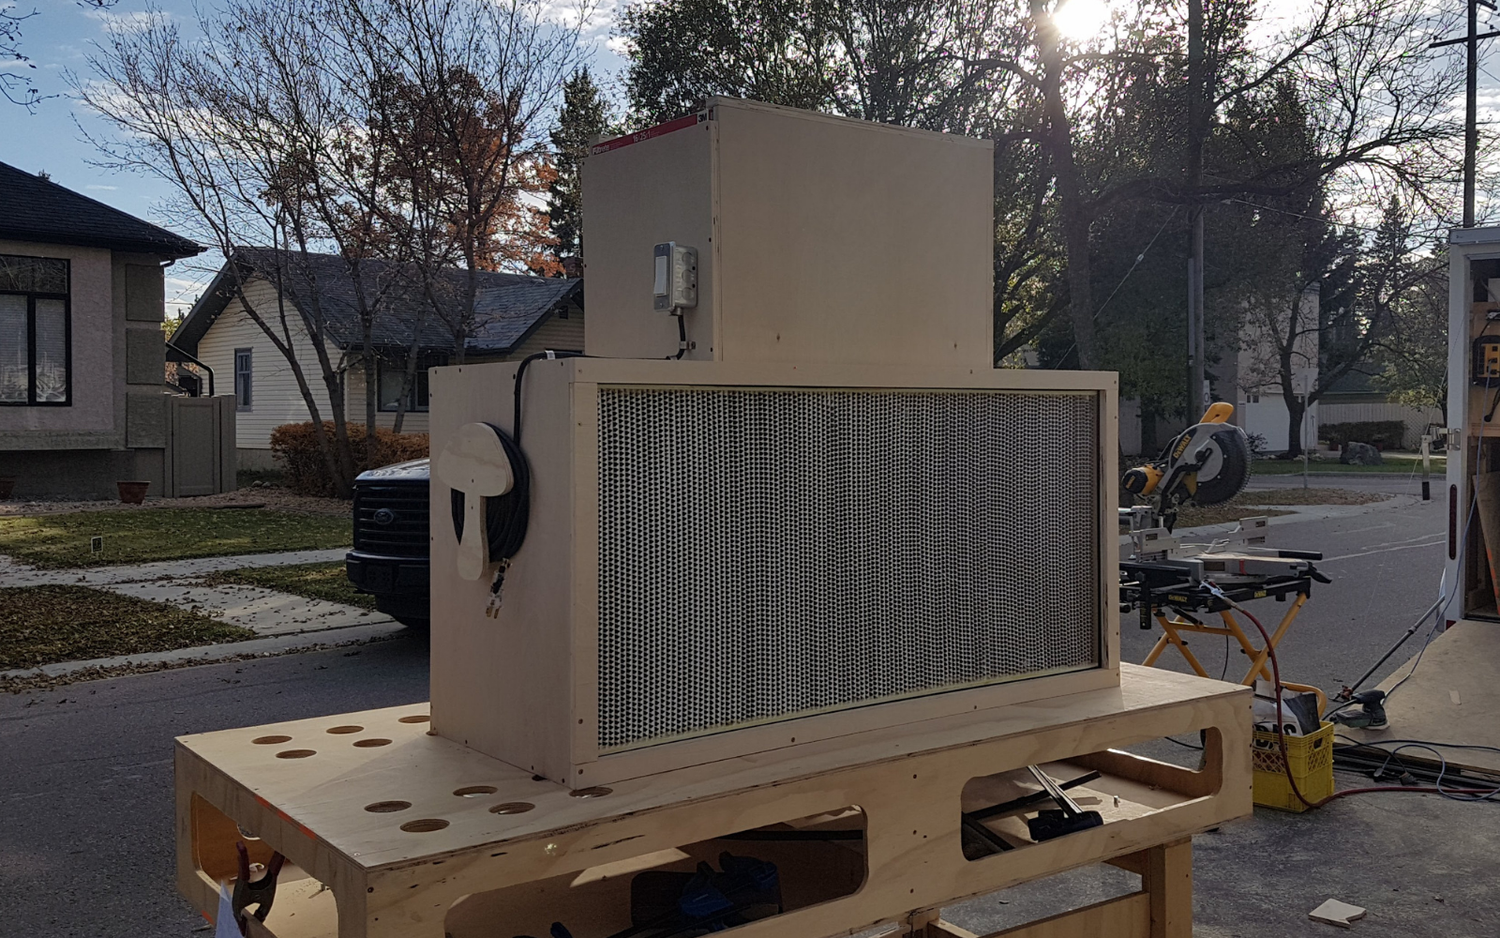
A properly constructed laminar flow bench can allow for ultra clean laboratory conditions even in a not so clean environment such as your kitchen or basement, greatly increasing chances of success for a home cultivator.

What is it?
The typical laminar flow cabinet consists of three parts:- A High Efficiency Particulate Air filter (HEPA filter) and pre-filter.
- A properly sized blower fan.
- A box to hold it all together and provide a plenum for laminar flow.
STEP 1: Choose a filter
The main consideration when choosing a filter is size. A 12″ x 12″ filter may be okay for home cultivation, but the relatively small size makes it difficult when dealing with large spawn bags or multiple jars. Bigger filters, however, require a more powerful and more expensive fan to push through the required amount of air. A good size filter for at home or small scale commercial cultivation is 12″x 24″ or 18″x 24″ or 24″ x 24″. You want the filter to have an efficiency rating of at least 99.97 % at 0.3 microns. This means that the filter will stop 99.97% of the contaminants sized 0.3 microns or smaller, allowing for a high chance of success.
Another consideration when choosing a filter is the static pressure.
Most HEPA filters will have between 0.8″ and 1.0″ of static pressure (measured in inches of water). This is simply a measure of the amount of friction between the filter media and the air being pushed through the filter.
You will also want to add a pre-filter, which is cheaper and easier to replace than a HEPA and will stop big particles from clogging up your filter. It is generally installed at the intake of the blower fan. You can use cut-to-fit vent filters to customize the pre-filter to the size you need.
This pre-filter will have a static pressure of 0.1″ to 0.2″, making the total static pressure of the filter system somewhere between 1.0″ and 1.2″. This is actually quite a lot of static pressure and requires an adequately sized fan in order to provide a sufficient stream of clean air over your work area.
The information for both the efficiency and the static pressure of the filter should be provided by the manufacturer. You are unlikely to find this type of HEPA filter locally, however, there are many sources online, offering a number of different sizes.
Here is a good one from Amazon, a Novatek filter that measures 24″ x 24″. Or this 24″ x 24″, by Filtration Group is also good choice. If you want to build a smaller filter, you can choose to get a 12″ x 12″ HEPA filter, which may be adequate- albeit just barely- for small scale home cultivation.
NOTE: Make sure you get a proper deep seated filter, such as the ones listed above in order to get smooth laminar flow through the face of the filter. There are cheaper “HEPA” filters, such as the once available for home furnaces – but don’t get these. They will filter the air just fine, but will not produce laminar flow, and thus won’t work for your flow hood.

STEP 2: Size the fan
Laminar flow hoods typically use a squirrel cage type blower fan that is mounted on top of the hood. These fans are rated based on the volume of air that they produce at zero static pressure in cubic feet per minute (CFM). As the static pressure increases, the amount of air the fan can produce decreases. The volume of air that a particular fan can provide at a given static pressure can be shown in a “performance curve” which is usually provided by the manufacturer. For mushroom cultivation, it is generally suggested that the stream of clean air should flow over the workbench at a speed of 100 feet per minute. This means that the volume of air flow required in CFM can be determined by multiplying the area of the filter by 100 ft/min. For example, an 18″ x 24″ filter will have an area of : 1.5ft x 2.0ft = 3.0 sqft. Therefore, the volumetric flow rate of clean air required for mycological work is 3.0 sqft x 100 ft/ min = 300 cubic ft / min or 300 CFM. This means we need to find a fan that can provide 300 CFM of air at the static pressure of the HEPA filter and pre-filter combined. To continue the example, let’s say that the HEPA filter has a static pressure of 0.8″ and the pre-filter has a static pressure of 0.2″, giving a total static pressure of 1.0″. A typical performance curve for blower fans will look like this:
The fan in this example has two speeds, Lo and Hi, as shown in the chart.
We can find out the volumetric flow rate of the fan at our static pressure by looking at the curve. As you can see, at 1.0″ of static pressure, this fan should provide a flow rate of 320 CFM at the Hi setting.
This is called the working point, and since we required at least 300 CFM, the fan should be adequate.
The fan I ended up using for my laminar flow hood was the Dayton 1TDT8, pictured here.
It has two speeds, so you can set your speed depending on the amount of resistance from your flow hood.
You can also use the higher speed to scrub the air of your lab quicker. You will need to wire in the fan using a switch. A simple light switch will work just fine.
Dayton also has a number of other fans that are reasonably priced and of good quality. Make sure you can also find the performance curve for your fan. There are a number of good choices at the end of this article.
You don’t want a fan that is too overpowered, but it's better to have slightly more flow than not enough. Eventually, the resistance of the filter will increase as it gets dirtier, so having it slightly overpowered should be helpful.
If you look hard enough, you should be able to find a fan that will exactly match your filter. Again, these fans might be hard to find locally, but you should have no problem locating one online.

STEP 3: Putting it all together
The final step is to construct a box to hold it all together. You want the box to have a reasonably sized plenum (enclosed area behind the filter), which acts to pressurize the air evenly over the back of the filter and produce laminar flow. Laminar flow simply means that the stream of air is moving evenly and consistently across the filter. You do not want turbulent flow, which will cause currents and unpredictable flows that can drag dirty air into your work area. You can check for laminar flow by holding a flame in front of your filter with the fan turned on. The flame should be bent over at a relatively constant angle within the entire stream of air flow. These hoods can be made relatively easy if you have the right tools. I was lucky enough to get help from my good friend Jeff over at The Home Stud. He’s got tons of great info on renovations, construction, and even some cool DIY hydroponics set-ups. Be sure to check it out!
The plenum should be 10-12 inches deep, not including the depth of your filter.
A good material for the box is finished plywood, at least 5/8″ thick and strong enough to withstand the vibrations caused by the fan. Use silicone to seal the edges, especially between the inside of the box and the filter.
You can build a separate box on top to house the fan with a pre-filter on the outside, or simply tape the pre-filter to the intake of the blower. There are many different ways to do this, so choose whatever works best for you.
Build This Same Hood
Wanna make your very own flow hood?
Check out the plans to build this exact hood below.
Pre-Built Flow Hoods
The cost of the fan, the filter and the plywood can actually get quite expensive. Add in the time and tools required to put it all together and it often makes more sense to buy a pre-built laminar flow hood from a reputable supplier. Without a doubt, the absolute best choice when buying a flow hood is the wonderful folks at Fungi Perfecti. They have a selection of pre-built flow hoods that should meet your needs at good prices. Check out the 24″ x 12″ Series I Laminar Flow Hood here.


